Wednesday, February 22, 2017

Portable Audio Recorders: Budget Sound for Filmmakers and Musicians

Zoom H1
Portable audio recorders are a great way to improve sound quality for film and music production. They typically have high quality built in stereo microphones. They're also able to record over USB, on a camera, or on a memory card.

DSLRs and camcorders aren’t known for their high quality audio. Luckily, portable audio recorders provide a solution. They are mountable to a camera or a nearby stand. Alternatively, they can be used separately and the audio synced with the video. The audio recorders can be mounted to a tripod or a microphone stand, with adapters available for both.

Another great use for a portable audio recorder is to capture lavalier microphones. Using wireless systems can be expensive. In some cases, it may be better to just record the sound directly on the person. Many of these recorders have a microphone input to support a lavalier microphone. They also include a hold switch that prevents the settings from being accidentally changed.

Finally, portable audio recorders can be used to record music. If you’re a musician, they provide a way to capture recordings of your ideas. This is much easier than setting up multiple microphones and mixing after.

After capturing an audio track, they can be imported on a computer. The files can be used with a video editor, or edited using Audacity.


Zoom H1


The Zoom H1 is a fantastic option as a portable audio recorder. It’s sleek design and high quality recording makes it great for professional and amateur use. It can act as a standalone recorder, USB microphone, or external microphone for a camera.

There are two audio file formats available; it can record as an MP3 or WAV file, with quality up to 96kHz and 24-bit. This provides a high quality recording, but comes at the expense of memory space. The Zoom H1 also has a recording time indicator on the screen. This tells the user know how much available recording time there is on the microSD card. It does include a 2GB microSD card, but it can support up to 32GB.

The Zoom H1 can also act as a microphone for a DSLR camera or camcorder. To record with a camera, connect the line output to the microphone input using a 3.5 mm cable. Keep in mind that the quality settings on the Zoom H1 do not affect the quality. The camera determines the recording quality settings. When setting this up, adjust the output level so that the camera records without any distortion. Additionally, the Zoom H1 is camera-mountable using a Zoom HS-1 hot shoe mount adapter.

The Zoom H1 portable audio recorder also has an available windscreen. This is great for outdoor recording, or to prevent blasts of air when recording voice up close. We would recommend using a windscreen whenever using the built in microphone. It’s unlikely to negatively affect the sound, but there's no way to remove wind noise after.

The Zoom H1 can record through USB, as if it were a USB microphone. The USB port can power the microphone, or transfer files stored on the microSD card.

There are buttons to delete files, fast-forward, rewind, play/pause, and adjust the input gain. The input gain works to adjust the level of the built in or external microphone. It allows for level adjustments depending on the volume of audio. The control can boost quiet signals and or decrease volume to prevent clipping.

The power switch also has a hold button option. The hold switch prevents accidental setting changes. This switch is especially important when recording a lavalier microphone. In this case, it’s really easy for the wearer to change a setting and ruin the recording.

Tascam DR-05


The Tascam DR-05 is a competitor to the Zoom H1. It provides similar features and quality for around the same price. The Tascam DR-05 features a stereo pair of microphones on the top. It is also capable of recording with an external microphone through its ⅛” input. This is great for using lavalier microphones for voice, but some people have had problems with a noisy input jack.

Like the Zoom H1, the Tascam DR-05 can record in MP3 and WAV files, as well as 96kHz and 24-bit. The Tascam DR-05 comes with a 4GB microSD card, but can support up to 32GB. As previously mentioned, you’ll need to consider recording time and audio quality.

This audio recorder is mountable to a DSLR camera to improve the audio. This will require an adapter. Since the mounting setup is the same, the same adapter would work for both recorders.

Powering the Tascam DR-05 requires 2AA batteries, so it uses a little more power than the Zoom H1. If using the recorder a lot, we recommend a good set of rechargeable batteries to save money.

To monitor playback with the Tascam DR-05, it’s best to use a set of headphones. The recorder does have a built in speaker, but it's not very loud. Always use a regular set of headphones with these devices. Headphones designed for cellphones that have a built in microphone don't work.

The Tascam DR-05 has a settings menu, instead of the Zoom H1's switch system. This is more complicated to learn at first, but it provides more options.


Overall, these two portable audio recorders have nearly identical capabilities, and both come in at around the same price. The Zoom H1 has a slightly better speaker, but the Tascam DR-05 includes a 4GB microSD card instead 2GB. Also consider, the microphone arrangement; the Tascam DR-05 has a regular stereo configuration while the Zoom H1 has an XY configuration. If you’re looking for portable audio recorders, we can’t recommend one over the other. Both will have very similar performance and quality, so we suggest choosing the one that you like best.

Sunday, February 19, 2017

Linux Digital Audio Workstations: Open Source Music Production

Linux Digital Audio Workstations
When most people think of music programs, they’ll usually think Mac OS or Windows. However, there are also a few Linux digital audio workstations. The support and features of these programs can vary, but they’re a good choice to setup a cheap recording studio. Some of them are even good competitors for paid programs, offering features such as multitrack recording, MIDI, and virtual instruments.

Keep in mind that many audio editing programs for Linux rely on the Jack backend. You’ll need a dedicated system to install these programs on, since it doesn’t work properly in a virtual machine.

If you're not familiar with Linux, we recommend the book Easy Linux For Beginners. Linux can be difficult to learn at first, but the power you'll be able to unleash after will make it worth the time.

In the following article, we’ll cover audio editing programs that are available for Linux. We’ll talk about the available features, as well as help you decide which program to use for your needs.

Linux Digital Audio Workstations

Audacity

Audacity

Audacity is a simple audio editor that is available on Windows, Mac, and Linux. Though it doesn’t have many of the features of some full DAWs, it is easy to learn and use. The average user can be recording with Audacity in only a few minutes.
Audacity is able to record up to two tracks at once when set to stereo mode. Otherwise it is usually only used for one track at a time.

There are quite a few effects available to be used with Audacity. It features all the basics, such as equalization and compression, as well as track controls for panning and volume. There's also support for Nyquist, VST, and LADSPA effects. However, editing in Audacity can be destructive. If an effect has been applied to a track, the only way to remove it is with the undo button. This can be problematic if further editing was already done.

Audacity also doesn’t support MIDI or any virtual instruments. If you plan on using these, it’s probably not the right program for you.

The lack of features included with Audacity make it easy for anyone to use. Some great uses are capturing narration for videos, or recording podcasts.

Qtractor

Qtractor


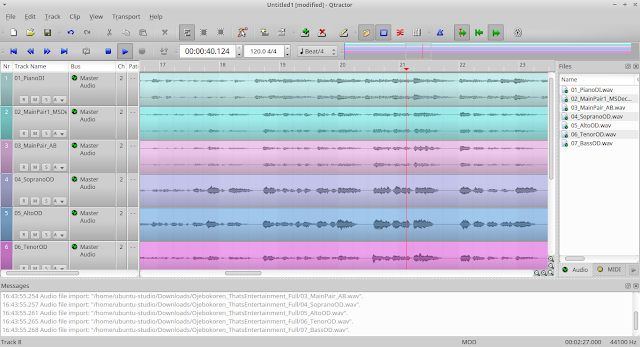
Qtractor is a full digital audio workstation that is open source and completely free to install and use. The program is still in development, but there are a variety of features such as multitrack recording and MIDI composition.

One concern with Qtractor is that it’s only available to use on Linux. Though this article focuses on Linux programs, there are less people using these applications. Therefore, there isn't always as much support online. This isn’t always an issue, but it will make finding support online more difficult.

If you’ve got some Linux skills or are able to pay for Ardour, we would recommend it instead of Qtractor. To learn more about compiling and installing the latest version of Qtractor, click here.

Ardour

Ardour


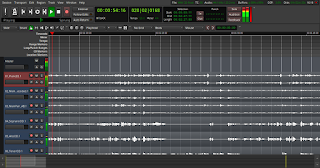
Ardour is easily the best of the Linux digital audio workstations. Its kept up to date and has plenty of support available online. This program has support for multitrack recording and MIDI instruments. Out of all the programs available on Linux, Ardour is the most competitive against Mac and Windows DAWs. This program also has track automation, allowing panning and volume to change automatically. There’s also support for video soundtrack editing.

Though Ardour has a lot of features, expect to invest quite a bit of time learning how to use it. The program is very powerful, but it is a full DAW and there's a learning curve when starting.


To get the latest version of Ardour, you may have to either pay for the installer, or compile it. Compiling the program is completely free and the source code is available online. We've covered how to compile the program in detail in the video below. The total time to compile the program should take less than 20 minutes. Most of this time is just downloading and processing time. The actually steps you’ll need to do only take a few minutes.


We hope you found this information on Linux digital audio workstations useful and informative. Linux provides an excellent platform for audio editing. Linux digital audio workstations have a lot of support online and are free to use.

Friday, February 17, 2017

Dunlop Dual Design Straplok System Installation and Review


If you’ve ever worried about dropping your guitar while performing, the Dunlop Dual Design Straploks might be a solution. This system securely attaches your guitar and strap, so there’s basically no risk of it falling.

In the following article, we’ll discuss how to install the Dunlop Dual Design Straploks. We installed them on a Squier SE Strat that still had the original strap buttons on it. In our case, we installed the strap locks to allow us to use straps that had the system already installed.

Materials and Tools
tools-for-installation

To do this installation, all you need is a strap, the Dunlop Dual Design Straploks, a #2 Phillips screwdriver, and a set of pliers (optional). Not all straps will work with this system. Many padded leather straps, such as Levy’s 3.5” Padded Leather Guitar Strap, can’t be used. These straps are too thick and the clip won't fit properly. However, these straps usually don’t stretch, so there isn’t much of a risk of them coming loose from the guitar. Most standard guitar strap thicknesses will work with this system.

Though the instructions recommend to drill larger holes in the guitar, this isn’t necessary. The existing holes are usually larger enough for the screws to easily thread in. Keep in mind that if you don’t drill it may require a little more force to screw in the strap locks.

If you find that the existing screw holes are too loose and the screw isn’t biting in properly, the holes can be filled using toothpicks and wood glue. This will make the connection more secure. This will also be necessary if at some point you decide to put the original strap buttons back on the guitar.

Preparation

Before you can begin, you need to remove the existing strap locks from the guitar. All you’ll need for this is the #2 Phillips screwdriver we mentioned previously. Just unscrew the existing strap buttons and set them aside. You may want to hold onto these in case you decide to sell the guitar in the future. If you’re guitar doesn’t have felt washers to protect the finish from the strap buttons, now may be a good time to add some. Otherwise you can just use the existing ones on the guitar.

Guitar Installation
Guitar Installation

Now you can install the Dunlop Dual Design Straploks. First remove the strap retainer from the strap button by pushing the button in the middle and pulling it out. Then, put the screw through the strap button and screw it into the existing holes in the guitar. You’ll want to use the screws that came with the strap locks. These screws are usually a little thicker than the existing screws. This makes them more secure in the existing holes. Also, some existing screws have a large head that won’t fit inside the strap button. It’s important that the screw can fit in the strap button to allow the strap retainer to fit properly. Screw the strap button in until it’s hand tight. Don’t over-tighten, as this can damage the guitar. If you strip the holes, you'll need to fill them in and start over.

Strap Installation

Strap Installation

The strap installation step can be a little tricky. To install the strap, put the strap retainer through the strap. This will need to clear the hole in the strap for the washer and clip to fit on. Then put the washer on. Finally, the hardest part is to get the clip in place. This takes quite a bit of force, and is the one thing we dislike about this system. The clip fits in a groove after the washer has gone on and prevents the washer from coming loose.

To get the clip in place, you can squeeze it against the shaft of the retainer with a pair of pliers. If you don’t have pliers, you can also push it into place with a flat screwdriver, but this is more difficult. Don’t try to install this with your hands. You’re unlikely to be able to get the small clip in place, and even if you do, it will be painful.

Though difficult to install, this strap lock design is actually pretty good. It evenly distributes the weight of the guitar over the strap hole, preventing stretching. This can be a problem with some strap buttons and it will easily ruin a strap.

Final Steps

Before using your strap locks, there are a few things you’ll want to do. First, Dunlop recommends lubricating the strap locks. The strap retainer has small ball bearings inside. If they aren’t kept lubricated, they can get stuck. We’ve never had this issue with the strap locks before, but it’s something to consider. To prevent this from happening, spray a lubricant in the strap button such as WD-40. Then, put the strap retainer in place and spin it to make sure all the surfaces are coated.

One final thing you should do is give the system a good test. Put the strap lock in, and listen for a click. If you hear the click, it's latched in place. Give it a solid tug to make sure that it doesn’t come loose and the whole system is secure. At this point, you’re ready to start using your new strap locks. 


Our Opinion

Overall the Dunlop Dual Design Straploks are a solid choice for securing your instrument against unexpected falls.

As previously mentioned, the system isn’t perfect, but none of these issues are a deal breaker. We’ve mentioned that the strap retainer clip can be difficult to install, and that the system requires occasional lubrication to keep it working smoothly.

There are a few advantages to using this system over some of the others. First, the entire system is pretty low profile, and doesn’t drastically change the look of your guitar. Also, it’s available in nickel, black, gold, and brass to match any existing hardware on your guitar. Finally, the strap lock system buttons are large to use with another strap that doesn’t have the system installed on it. Just don’t expect to be using an installed strap with normal strap buttons on another guitar!


Final Installation

Friday, February 10, 2017

Lavalier Microphones: Cheap Voice Recording for Filmmakers and Podcasters

Lavalier microphones are a fantastic way to capture voice for a video. They clip to a person’s clothing and don’t stand out in the video. Depending on your setup, you may be able to use multiple microphones. Whether you’re making a YouTube video, podcast, or recording a film, lavalier microphones are a must have solution.

One advantage of lavalier microphones is their portability. Though many expensive wireless solutions exist, there are also a lot of budget friendly systems available. It's not always necessary to record wirelessly. Instead, keep the recorder in a pocket and attach the microphone. If portability isn’t much of an issue, you can record with a computer or camera.

Camera and laptop microphones can pick up excessive background noise. This isn't usually an option for professional applications. These solutions are a great way to improve your production quality, while still using cheaper equipment.

Lavalier Microphones

Neewer Mini Lapel Microphone

The cheapest option available for lavalier microphones is the Neewer Mini Lapel Microphone. This is an omnidirectional microphone. This microphone works with a camera or computer. The Neewer mini lapel microphone isn't compatible with cellphones.

Though their quality isn’t the best, the cheap price makes these microphones a good backup. They make a good addition to any recording kit in case other lavalier microphones break. Keep in mind to test your microphone before using it, because the cables can fail.

PowerDeWise Lavalier Microphone

If you’re planning on recording with a phone, the PowerDeWise Lavalier Microphone is a good option. This lavalier microphone works with iOS, Android and Windows phones. The PowerDeWise microphone also includes an extension cable. There’s also an adapter to use it with a laptop, camera, or portable recorder. Overall, the sound quality of the PowerDeWise microphone is better than the Neewer. The build quality is also an improvement. This microphone will pick up less noise and will last longer. Though the quality is better, it is still always important to test it before each use.

Portable Recorders

To achieve high quality professional recordings, a good solution is to use a dedicated portable recorder. Though portable recorders have a built in microphone, they also support lavalier microphones. A good example is the Zoom H1 Handy Portable Digital Recorder. This device is capable of recording at a sample rate of 96 kHz and a bit depth of 24 bit.

Portable recorders capture audio on a microSD card. You can access the files on a computer for editing. The recorder comes with a 2 GB card, but it can be upgraded to a 32 GB card, such as the SanDisk Ultra 32GB.

Cellphone Recording

If you’re not looking to buy a portable recorder, it’s also possible to use a cellphone. There are a few apps available, such as RĂ˜DE Rec (iOS) and Samsung Voice Recorder (Android). This is a cheap, portable solution, since most people have a phone accessible. Portable recorders provide better quality, but using a cellphone is best for most people.

Computer Recording

If you’re using a lavalier microphone to make a YouTube video or podcast, you may have a computer nearby. If this is the case, plug the lavalier microphone into the computer. Then you don’t need to use an external recorder or a phone to capture the audio. We recommend using Audacity to capture all the audio, since it’s free and simple to use. To learn more about Audacity, check out the video here.

Regardless of how you've recorded the sound, Audacity is a great editing program. Use compression to level out the volume if necessary. Depending on the microphone, you may want to use equalization to adjust the frequency balance. If there's a lot of background noise, use noise reduction to remove it. After all the editing is finished, export as a WAVE file.

Combining Your Audio and Video

It's easy to combine audio and video after recording. You can do this with just about any video editing software. Just make sure the timing is right, since there’s nothing worse than out of sync audio!


Overall, lavalier microphones are simple way to record voice portably. They provide great sound quality for voice without picking up extra noise. When budgets are tight, we hope you like these solutions for capturing voice for a video.

Monday, February 6, 2017

Electric Guitar Recording: Tips and Tricks for the Home Studio

Electric Guitar RecordingElectric guitars are essential to many different genres of music. Recording electric guitar is a complex process that is harder than it seems. It's very trick to get a balanced sound that fits well with the other instruments.

One of the most important parts of recording a guitar is dialing in your tone before you spend time recording. Otherwise, it will be very difficult to get a nice sounding mix, even after a lot of time is spent processing the guitar track. Your guitar tone should sound basically how you want it as soon as the signal is captured by the audio interface.

Finding Your Tone

As with many instruments, the first step to recording an electric guitar is getting a good tone. This means experimenting with different guitar and amp settings until you find something well suited to your song.

Your first consideration should be the type of guitar tone you plan on using. The pickups in a guitar can drastically change its tone. Both single coil and humbucker pickups have their place in a wide variety of music. Along with the type of pickup you're using, pickup position and tone settings will also affect your sound.

After deciding on a guitar, the amp must be set up to your desired settings. First, you must decide whether you plan on using a solid state amp or a tube amp. Solid state amps have come a long way in recent years and are inexpensive compared to tube amps. Tube amps on the other hand are still praised for their classic tone and warm sound. We covered tube amps for recording in a separate article that can be found here.

After selecting an amp, the first setting to consider is the gain. This will be the difference between a clean and distorted guitar sound. Guitar amps also have an option to control the level of low, mid, and high frequencies. Avoid using reverb with the guitar amp, since you can't remove it after.

Recording Electric Guitar

Amp Recording

Shure SM57
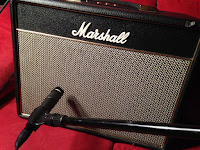
Once a good guitar tone has been set in the room, it's time to capture that perfect sound. Guitar amps can be recorded using a good dynamic microphone, such as a Shure SM57. The microphone should be placed a few inches from the center of the speaker. If you are unsure about the exact location of the speaker in a cabinet, a good trick is to shine a flashlight through the front grill. Placing the microphone close to the center of the speaker will give a bright sound with a lot of high frequencies, whereas moving towards the edge of the speaker creates a warmer sound. You can also place the microphone off-axis to change the tone.

Choosing a microphone position will require a bit of patience. It’s really important to get this right before recording, otherwise the only way to fix it is will a lot of EQ and compression. Don’t bother recording the track if you’re not happy with it, make sure you have a good tone first.

Another trick that can be used to record a guitar amp is placing a condenser microphone further back in the room to pick up more ambience. The farther the condenser microphone from the amp, the more ambience is picked up. This microphone can be blended with the dynamic microphone to create a larger sound. It also gives more flexibility when mixing later on. You can use as little or as much as the condenser microphone as you want since it's on a separate track.

Direct Recording

Behringer Ultra-DI DI100
One fantastic option when recording an electric guitar amp is to record the amp itself and a direct guitar signal. You can do this with a direct box, such as the BEHRINGER ULTRA-DI DI100. This device will send a line level guitar signal to your audio interface, and also send the guitar signal out to an amp. This acts as a backup plan, in case your performance is really good but the guitar recording is not. You can then send the direct signal back to the guitar amp and try recording it again.

Direct guitar signals also work great for people who are unable to record a guitar amp. If you’re in an apartment and don’t want to make too much noise, or you’re trying to record late at night, you can just make a direct recording. This allows you to re-amp the signal and record at another time or use a guitar amp simulator such as Guitar Rig 5.

Amp Simulation

Guitar Rig 5 is a great option for recording guitar. The software provides many amp simulations for direct guitar. It makes a guitar sound like it were recorded with a real amp. Then, you can capture the processed signal onto a track and mix it as if it were recorded normally. There’s also a lot of different effects such as reverb, phasers, flangers, delays, and choruses.


Line 6 POD HD PRO XIf you’re hesitant towards using software amp simulators, there are also hardware options available. Though these options are typically more expensive, they can also be used live. The whole concept of the rack amp simulator is similar to Guitar Rig 5. If you’re looking for a good rack amp simulator option, the Line 6 POD HD PRO X is worth considering. However, when using hardware amp simulators, the settings can’t be changed after if you record the processed signal. For this reason, we recommend recording the direct guitar signal and looping the outputs of your audio interface back into the signal processor after, allowing you more options to change the tone during mixing.

Equalization and Compression

Once the final signal is recorded, you need to tweak the EQ and compression during mixing to get the electric guitar to fit. These fixes should be fairly subtle, otherwise there were problems that should have been fixed during the recording process. In general, we recommend a slight amount of compression to level out the volume. Be careful at this stage, it’s a fine line between leveling an uneven track, and destroying all your dynamic range.

As for equalization, your guitar tone itself should sound pretty close what you’re looking for. If you’re planning on recording other instruments with a lot low end, we recommend a high pass filter. This will cut off some of the low frequencies and allow the other instruments to be heard. Without using one, you could easily end up with a cluttered low end, as well as a guitar and bass that are indistinguishable.


When recording electric guitar, getting a good tone that fits your mix can be difficult at first, but experimentation and practice will allow you to record professional sounding guitar tracks at home. Just remember to be patient, and always make sure you have the tone you want BEFORE hitting that record button.


Friday, February 3, 2017

Leelbox Virtual Reality Glasses Review


The Leelbox Virtual Reality Glasses are a great way to experience VR. Requiring only a cell phone to use, this headset is simple and works great. It’s very comfortable and the adjustments allow it to be used with minimal eye strain.

This headset includes a few accessories in the box, but none of them are really useful. There’s an instructions manual that covers the details of how to get the headset setup. It also comes with a lens cleaner if the lenses get dirty. There’s also a few adhesive padding pieces, but we haven’t been able to figure out where those go. They’re not mentioned in the instructions and don’t appear to be a replacement for any existing part of the headset. Their absence would likely not be missed anyways.


Leelbox Virtual Reality Glasses Supported Phones
To use this headset, all you’ll need is a cell phone running iOS or Android. It supports cellphones from 4.7-6”, so just about any newer phone will work. The experience you have will depend largely on what apps you download, and not on the headset itself. When just starting, we recommend the Google Cardboard app, but there’s plenty of others available, and you can even watch 360° YouTube videos by turning your head around.

Setting up the Leelbox Virtual Reality Glasses


Strap Adjustment

The Leelbox headset has a few adjustments to make it more comfortable and easier to use. When adjusting the headset, start with the straps. There are Velcro adjustments on the two side straps. Adjust them to the point where they’ll stretch to the back of your head, but don’t make it too loose. Then adjust the top strap so that the triangle formed by the 3 straps sits in the back of your head. If the strap keeps pulling loose to the top of your head, the top strap is too tight. Keep in mind that the straps are elastic, so they can stretch. It’s better to have them a little too tight than have them loose and let the headset fall to the ground as you’re looking around.

Putting in the Phone

The next step is to put the phone in. If you have a thick case on your phone, you’ll need to remove it. Otherwise the magnetic latch for the front plate of the headset will not close. Place the top end of the phone in place first and push up and back until it locks in place. Then, make sure the phone is centered. If there’s any part of the headset that’s weaker than others, it’s probably the phone slider. The plastic that holds the phone in seems flimsy, so be careful when putting the phone in. It’s also at a position that it can accidentally push the side buttons on the phone, such as the lock button or volume controls for iPhone users. Though there are a few problems with this setup, it is still a good solution since it allows many different types of phones to be used.

Lens Positioning

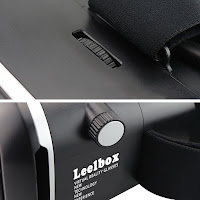
Leelbox Virtual Reality Glasses Lens AdjustmentOnce the phone is in place, you’ll need to adjust your pupil distance. This adjusts the distance between the lenses, allowing them to accommodate different distances between eyes. To do this, turn the knob on top of the glasses until you can comfortably see the image on the screen. Next, adjust the focus. There’s a knob on the side of the headset that moves the phone forwards and backwards relative to the lenses. This is helpful for people who normally wear glasses, since they won’t fit with the headset on.

Now you’re ready to experience virtual reality. Put the headset on and look around in your app. The motion of the phone will change the view. Depending on what app you choose, it may be in full 3D.

Review

As far as comfort, this headset is pretty good. The padding is very soft and there’s no feeling of pressure against your face. We did notice on our model that the padding can sometimes pop off it accidentally tugged on, but the plastic piece snaps back into place very easily. The headset is also very light, so it doesn’t pull your head down when you’re wearing it.


Leelbox Virtual Reality Glasses detachable cover
One thing you may notice when using VR apps on your phone is that it creates a lot of heat. Luckily, the makers of the Leelbox headset came up with a solution. There are holes on either side of the phone compartment that allow air to flow through. Conveniently, they can also be used to keep your headphones plugged in while using the headset. If the phone is still getting too hot, you can remove the front cover. This allows much more air to flow through and should keep the temperature under control.

Limitations


Though the overall build quality of this headset is good and it provides a fantastic VR experience, we recommend limiting your use, or taking short breaks while using the headset. Looking through the lenses for a long time can cause eye strain. Also, depending on the app, there can be a little bit of delay between moving your head and the view changing on the phone. This is enough to cause motion sickness in some people.

Unlike some other headsets, this one does not have a magnetic slider to act as a control while in the app. This isn’t a problem though, since not all phones can even use this. Usually, you can make a selection by looking at a point for long enough.


If you’re looking to get into virtual reality, we highly recommend trying out the Leelbox Virtual Reality Glasses. They provide an easy and inexpensive way to experience virtual reality using only your cellphone.