Saturday, February 25, 2017

Action Cameras: Durable Video for Athletes and Adventurers

Action cameras are a great way to capture just about any sporting event or activity. They are incredibly versatile and mountable to just about any surface.

These action cameras are great for anything from surfing to skiing, and even as a car dash camera.

Action cameras are durable and work in a lot of situations without having to worrying about damage. They also typically come with a waterproof enclosure, allowing them to record video and take pictures underwater.

There's a variety of different action cameras available, but they don't all record at the same quality. When choosing a camera, you'll need to consider both the resolution and the frame rate. There's no reason to buy a camera with a high resolution of the video won't be smooth due to a low frame rate.

Two good action cameras are the APEMAN Action Camera and the SJCAM SJ5000x Elite.


Budget Action Cameras

APEMAN Action Camera


The APEMAN Action Camera is a good low price option. Though the video quality isn't fantastic, this camera is very good for the price. It's very durable and has a lot of different options, making it very versatile.

The APEMAN Action Camera has a lot of different mounting options available, including adhesive bases and tripod mounts. There's also a waterproof case to film video underwater up to 30m.

The camera captures video on a microSD card, and it supports up to a 32GB card. There are settings to record in 1080p, 720p and WVGA. All the files as saved as an MOV file using H.264 encoding, so they can be edited with most software. It can also take pictures up to 12 MP.

This camera comes with a 1050 mAh battery that allows it to record for up to 120 minutes on a 3 hour charge. The batteries are removable and can charge inside the camera or using a charging dock that is sold separately.

The APEMAN action camera doesn't record as smooth as expected, and the video can get blurry if the camera is moved. This is due to it only recording at 30fps. Also, it doesn't fit perfectly within the waterproof case, which can allow the camera to vibrate in some situations. There can also be issues when trying to record in low light.

As far as audio, the APEMAN camera is basically unusable, especially when in the waterproof case. If your plan is to edit the video to music, this isn't too much of a problem.

The APEMAN has a wide angle 170 degree lens, but this produces a little bit of image distortion. It would be better to have a narrower field of view than the image distortion.

SJCAM SJ5000x Elite


The SJCAM SJ5000x Elite is a higher quality action camera that can even hold its own against the GoPro Hero4. Like the APEMAN, there's also a lot of accessories to allow many different mounting options. This action camera captures a higher quality video, but it comes at an extra cost.

The SJ5000X is powered by a 900 mAh lithium battery, which is slightly less than that of the APEMAN camera. This battery is replaceable and fits within a battery compartment in the bottom of the camera. This battery can only record up to 80 minutes on a charge, which is fairly respectable, but we recommend purchasing additional batteries for longer filming.

To control this camera there are buttons on the side, top, and front which allow you to navigate a menu on the screen. There's also built-in wifi to control the camera. Connect an Android or iOS phone to the camera and use an app to change the settings.

The SJ5000X Elite is able to record in 4K at 24 fps, or in 2K at 30 fps. Keep in mind that the 4K resolution is actually 2880x2160, which is a 4:3 ratio, instead of the normal 16:9 ratio. It is able to record at 1920x1080 at 60 fps. We would recommend recording at this resolution. The higher frame rate would provide a much better quality and smoother video than the higher resolution with the low frame rate. Additionally, the 4:3 4K video would probably need to be cropped to achieve a 16:9 ratio on most platforms.

The camera captures video on a microSD card. It's able to use up to a 64 GB cars, which is quite a bit better than the 32 GB limitation of the APEMAN camera. It's also able to record in both MP4 and MOV file formats.

There is a 2” LCD screen on the back of the camera to preview and play back the video. There's also a speaker on the side of the camera. The camera can also connect via HDMI to a monitor, or to computer through microUSB.

Not only can the SJ5000X Elite record video, but it can also take images up to 12 MP.

The SJ5000X has superior video to the APEMAN camera, but this is reasonable considering the price difference. The camera has a few options for field of view, allowing it to record at 170, 140, 110, and 70 degrees. The wide 170 degree field of view is great for a lot of sports applications, but isn't appropriate for most videos. The 60 fps video creates much smoother motion allowing for crisp video during a fast-paced action shot. The camera quality is also sharper, and the camera fits inside the waterproof shell better than the APEMAN.

The SJCAM SJ5000x Elite is a great competitor to the GoPro HERO4. When comparing the video, it has more contrast and vibrant colors. Some people may prefer this, but overall the colors may not be as accurately captured. It's worth adjusting the settings within the camera to alleviate these problems.

There's also a difference in audio quality, even in the waterproof shell, the GoPro Hero4 is still able to pick up decent sound. In contrast, the SJ5000x doesn't capture a very loud audio signal when in the case. Since most action videos are edited to music and don't use the audio this isn't too much of an issue, and the case can always be removed if audio is a priority.


Both the APEMAN Action Camera and the SJCAM SJ5000x Elite are good action cameras for any situation. The APEMAN camera is a good budget option, but the SJCAM provides smoother and clearer video.


Wednesday, February 22, 2017

Portable Audio Recorders: Budget Sound for Filmmakers and Musicians

Zoom H1
Portable audio recorders are a great way to improve sound quality for film and music production. They typically have high quality built in stereo microphones. They're also able to record over USB, on a camera, or on a memory card.

DSLRs and camcorders aren’t known for their high quality audio. Luckily, portable audio recorders provide a solution. They are mountable to a camera or a nearby stand. Alternatively, they can be used separately and the audio synced with the video. The audio recorders can be mounted to a tripod or a microphone stand, with adapters available for both.

Another great use for a portable audio recorder is to capture lavalier microphones. Using wireless systems can be expensive. In some cases, it may be better to just record the sound directly on the person. Many of these recorders have a microphone input to support a lavalier microphone. They also include a hold switch that prevents the settings from being accidentally changed.

Finally, portable audio recorders can be used to record music. If you’re a musician, they provide a way to capture recordings of your ideas. This is much easier than setting up multiple microphones and mixing after.

After capturing an audio track, they can be imported on a computer. The files can be used with a video editor, or edited using Audacity.


Zoom H1


The Zoom H1 is a fantastic option as a portable audio recorder. It’s sleek design and high quality recording makes it great for professional and amateur use. It can act as a standalone recorder, USB microphone, or external microphone for a camera.

There are two audio file formats available; it can record as an MP3 or WAV file, with quality up to 96kHz and 24-bit. This provides a high quality recording, but comes at the expense of memory space. The Zoom H1 also has a recording time indicator on the screen. This tells the user know how much available recording time there is on the microSD card. It does include a 2GB microSD card, but it can support up to 32GB.

The Zoom H1 can also act as a microphone for a DSLR camera or camcorder. To record with a camera, connect the line output to the microphone input using a 3.5 mm cable. Keep in mind that the quality settings on the Zoom H1 do not affect the quality. The camera determines the recording quality settings. When setting this up, adjust the output level so that the camera records without any distortion. Additionally, the Zoom H1 is camera-mountable using a Zoom HS-1 hot shoe mount adapter.

The Zoom H1 portable audio recorder also has an available windscreen. This is great for outdoor recording, or to prevent blasts of air when recording voice up close. We would recommend using a windscreen whenever using the built in microphone. It’s unlikely to negatively affect the sound, but there's no way to remove wind noise after.

The Zoom H1 can record through USB, as if it were a USB microphone. The USB port can power the microphone, or transfer files stored on the microSD card.

There are buttons to delete files, fast-forward, rewind, play/pause, and adjust the input gain. The input gain works to adjust the level of the built in or external microphone. It allows for level adjustments depending on the volume of audio. The control can boost quiet signals and or decrease volume to prevent clipping.

The power switch also has a hold button option. The hold switch prevents accidental setting changes. This switch is especially important when recording a lavalier microphone. In this case, it’s really easy for the wearer to change a setting and ruin the recording.

Tascam DR-05


The Tascam DR-05 is a competitor to the Zoom H1. It provides similar features and quality for around the same price. The Tascam DR-05 features a stereo pair of microphones on the top. It is also capable of recording with an external microphone through its ⅛” input. This is great for using lavalier microphones for voice, but some people have had problems with a noisy input jack.

Like the Zoom H1, the Tascam DR-05 can record in MP3 and WAV files, as well as 96kHz and 24-bit. The Tascam DR-05 comes with a 4GB microSD card, but can support up to 32GB. As previously mentioned, you’ll need to consider recording time and audio quality.

This audio recorder is mountable to a DSLR camera to improve the audio. This will require an adapter. Since the mounting setup is the same, the same adapter would work for both recorders.

Powering the Tascam DR-05 requires 2AA batteries, so it uses a little more power than the Zoom H1. If using the recorder a lot, we recommend a good set of rechargeable batteries to save money.

To monitor playback with the Tascam DR-05, it’s best to use a set of headphones. The recorder does have a built in speaker, but it's not very loud. Always use a regular set of headphones with these devices. Headphones designed for cellphones that have a built in microphone don't work.

The Tascam DR-05 has a settings menu, instead of the Zoom H1's switch system. This is more complicated to learn at first, but it provides more options.


Overall, these two portable audio recorders have nearly identical capabilities, and both come in at around the same price. The Zoom H1 has a slightly better speaker, but the Tascam DR-05 includes a 4GB microSD card instead 2GB. Also consider, the microphone arrangement; the Tascam DR-05 has a regular stereo configuration while the Zoom H1 has an XY configuration. If you’re looking for portable audio recorders, we can’t recommend one over the other. Both will have very similar performance and quality, so we suggest choosing the one that you like best.

Sunday, February 19, 2017

Linux Digital Audio Workstations: Open Source Music Production

Linux Digital Audio Workstations
When most people think of music programs, they’ll usually think Mac OS or Windows. However, there are also a few Linux digital audio workstations. The support and features of these programs can vary, but they’re a good choice to setup a cheap recording studio. Some of them are even good competitors for paid programs, offering features such as multitrack recording, MIDI, and virtual instruments.

Keep in mind that many audio editing programs for Linux rely on the Jack backend. You’ll need a dedicated system to install these programs on, since it doesn’t work properly in a virtual machine.

If you're not familiar with Linux, we recommend the book Easy Linux For Beginners. Linux can be difficult to learn at first, but the power you'll be able to unleash after will make it worth the time.

In the following article, we’ll cover audio editing programs that are available for Linux. We’ll talk about the available features, as well as help you decide which program to use for your needs.

Linux Digital Audio Workstations

Audacity

Audacity

Audacity is a simple audio editor that is available on Windows, Mac, and Linux. Though it doesn’t have many of the features of some full DAWs, it is easy to learn and use. The average user can be recording with Audacity in only a few minutes.
Audacity is able to record up to two tracks at once when set to stereo mode. Otherwise it is usually only used for one track at a time.

There are quite a few effects available to be used with Audacity. It features all the basics, such as equalization and compression, as well as track controls for panning and volume. There's also support for Nyquist, VST, and LADSPA effects. However, editing in Audacity can be destructive. If an effect has been applied to a track, the only way to remove it is with the undo button. This can be problematic if further editing was already done.

Audacity also doesn’t support MIDI or any virtual instruments. If you plan on using these, it’s probably not the right program for you.

The lack of features included with Audacity make it easy for anyone to use. Some great uses are capturing narration for videos, or recording podcasts.

Qtractor

Qtractor


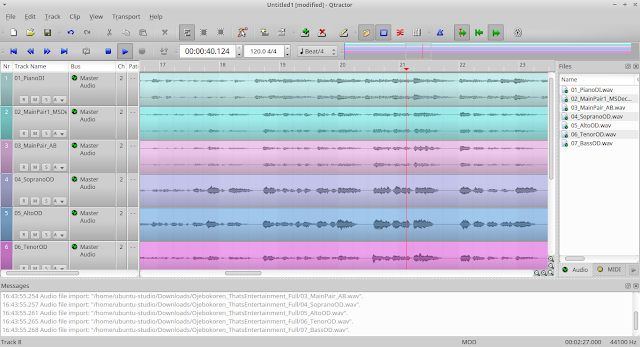
Qtractor is a full digital audio workstation that is open source and completely free to install and use. The program is still in development, but there are a variety of features such as multitrack recording and MIDI composition.

One concern with Qtractor is that it’s only available to use on Linux. Though this article focuses on Linux programs, there are less people using these applications. Therefore, there isn't always as much support online. This isn’t always an issue, but it will make finding support online more difficult.

If you’ve got some Linux skills or are able to pay for Ardour, we would recommend it instead of Qtractor. To learn more about compiling and installing the latest version of Qtractor, click here.

Ardour

Ardour


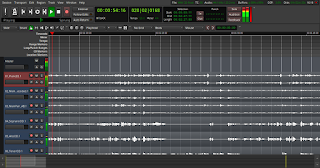
Ardour is easily the best of the Linux digital audio workstations. Its kept up to date and has plenty of support available online. This program has support for multitrack recording and MIDI instruments. Out of all the programs available on Linux, Ardour is the most competitive against Mac and Windows DAWs. This program also has track automation, allowing panning and volume to change automatically. There’s also support for video soundtrack editing.

Though Ardour has a lot of features, expect to invest quite a bit of time learning how to use it. The program is very powerful, but it is a full DAW and there's a learning curve when starting.


To get the latest version of Ardour, you may have to either pay for the installer, or compile it. Compiling the program is completely free and the source code is available online. We've covered how to compile the program in detail in the video below. The total time to compile the program should take less than 20 minutes. Most of this time is just downloading and processing time. The actually steps you’ll need to do only take a few minutes.


We hope you found this information on Linux digital audio workstations useful and informative. Linux provides an excellent platform for audio editing. Linux digital audio workstations have a lot of support online and are free to use.

Friday, February 17, 2017

Dunlop Dual Design Straplok System Installation and Review


If you’ve ever worried about dropping your guitar while performing, the Dunlop Dual Design Straploks might be a solution. This system securely attaches your guitar and strap, so there’s basically no risk of it falling.

In the following article, we’ll discuss how to install the Dunlop Dual Design Straploks. We installed them on a Squier SE Strat that still had the original strap buttons on it. In our case, we installed the strap locks to allow us to use straps that had the system already installed.

Materials and Tools
tools-for-installation

To do this installation, all you need is a strap, the Dunlop Dual Design Straploks, a #2 Phillips screwdriver, and a set of pliers (optional). Not all straps will work with this system. Many padded leather straps, such as Levy’s 3.5” Padded Leather Guitar Strap, can’t be used. These straps are too thick and the clip won't fit properly. However, these straps usually don’t stretch, so there isn’t much of a risk of them coming loose from the guitar. Most standard guitar strap thicknesses will work with this system.

Though the instructions recommend to drill larger holes in the guitar, this isn’t necessary. The existing holes are usually larger enough for the screws to easily thread in. Keep in mind that if you don’t drill it may require a little more force to screw in the strap locks.

If you find that the existing screw holes are too loose and the screw isn’t biting in properly, the holes can be filled using toothpicks and wood glue. This will make the connection more secure. This will also be necessary if at some point you decide to put the original strap buttons back on the guitar.

Preparation

Before you can begin, you need to remove the existing strap locks from the guitar. All you’ll need for this is the #2 Phillips screwdriver we mentioned previously. Just unscrew the existing strap buttons and set them aside. You may want to hold onto these in case you decide to sell the guitar in the future. If you’re guitar doesn’t have felt washers to protect the finish from the strap buttons, now may be a good time to add some. Otherwise you can just use the existing ones on the guitar.

Guitar Installation
Guitar Installation

Now you can install the Dunlop Dual Design Straploks. First remove the strap retainer from the strap button by pushing the button in the middle and pulling it out. Then, put the screw through the strap button and screw it into the existing holes in the guitar. You’ll want to use the screws that came with the strap locks. These screws are usually a little thicker than the existing screws. This makes them more secure in the existing holes. Also, some existing screws have a large head that won’t fit inside the strap button. It’s important that the screw can fit in the strap button to allow the strap retainer to fit properly. Screw the strap button in until it’s hand tight. Don’t over-tighten, as this can damage the guitar. If you strip the holes, you'll need to fill them in and start over.

Strap Installation

Strap Installation

The strap installation step can be a little tricky. To install the strap, put the strap retainer through the strap. This will need to clear the hole in the strap for the washer and clip to fit on. Then put the washer on. Finally, the hardest part is to get the clip in place. This takes quite a bit of force, and is the one thing we dislike about this system. The clip fits in a groove after the washer has gone on and prevents the washer from coming loose.

To get the clip in place, you can squeeze it against the shaft of the retainer with a pair of pliers. If you don’t have pliers, you can also push it into place with a flat screwdriver, but this is more difficult. Don’t try to install this with your hands. You’re unlikely to be able to get the small clip in place, and even if you do, it will be painful.

Though difficult to install, this strap lock design is actually pretty good. It evenly distributes the weight of the guitar over the strap hole, preventing stretching. This can be a problem with some strap buttons and it will easily ruin a strap.

Final Steps

Before using your strap locks, there are a few things you’ll want to do. First, Dunlop recommends lubricating the strap locks. The strap retainer has small ball bearings inside. If they aren’t kept lubricated, they can get stuck. We’ve never had this issue with the strap locks before, but it’s something to consider. To prevent this from happening, spray a lubricant in the strap button such as WD-40. Then, put the strap retainer in place and spin it to make sure all the surfaces are coated.

One final thing you should do is give the system a good test. Put the strap lock in, and listen for a click. If you hear the click, it's latched in place. Give it a solid tug to make sure that it doesn’t come loose and the whole system is secure. At this point, you’re ready to start using your new strap locks. 


Our Opinion

Overall the Dunlop Dual Design Straploks are a solid choice for securing your instrument against unexpected falls.

As previously mentioned, the system isn’t perfect, but none of these issues are a deal breaker. We’ve mentioned that the strap retainer clip can be difficult to install, and that the system requires occasional lubrication to keep it working smoothly.

There are a few advantages to using this system over some of the others. First, the entire system is pretty low profile, and doesn’t drastically change the look of your guitar. Also, it’s available in nickel, black, gold, and brass to match any existing hardware on your guitar. Finally, the strap lock system buttons are large to use with another strap that doesn’t have the system installed on it. Just don’t expect to be using an installed strap with normal strap buttons on another guitar!


Final Installation